Import Demo Data
We assume that you have installed WordPress and Dine theme already. Otherwise, please read this article for installing the theme first.
Step 1: Install Plugins
Make sure you have installed and enabled following plugins:
- Elementor: required
- (Dine) Elementor Addons: required
- Contact Form 7: optional, but it’s used to build the contact page
- Restaurant Reservation: optional
- WP Google Maps: optional
If you haven’t installed Elementor or (Dine) Elementor Addons, please go to Dashboard > Dine > Install Plugins to install them.
Step 2: Import Content
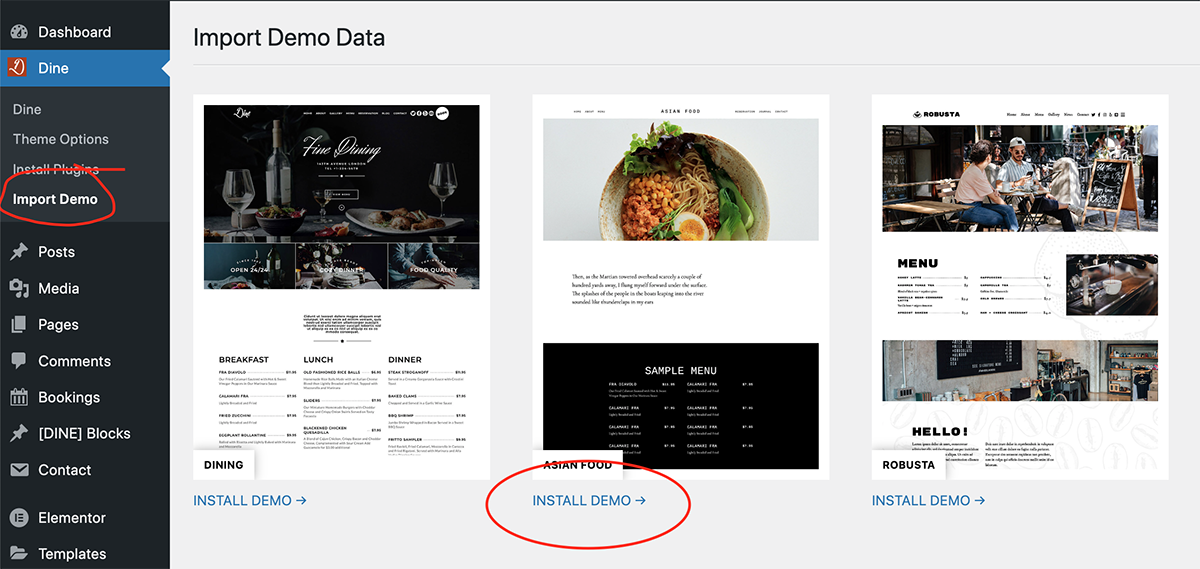
Please go to Dashboard > Dine > Import Demo.
Choose your demo your want to import then hit INSTALL DEMO.
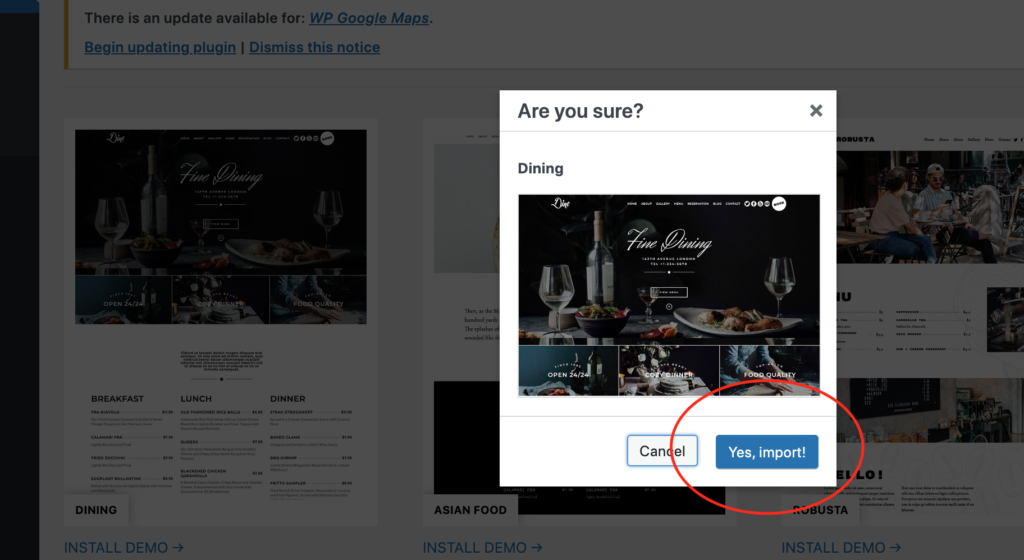
Choose Yes, Import!**
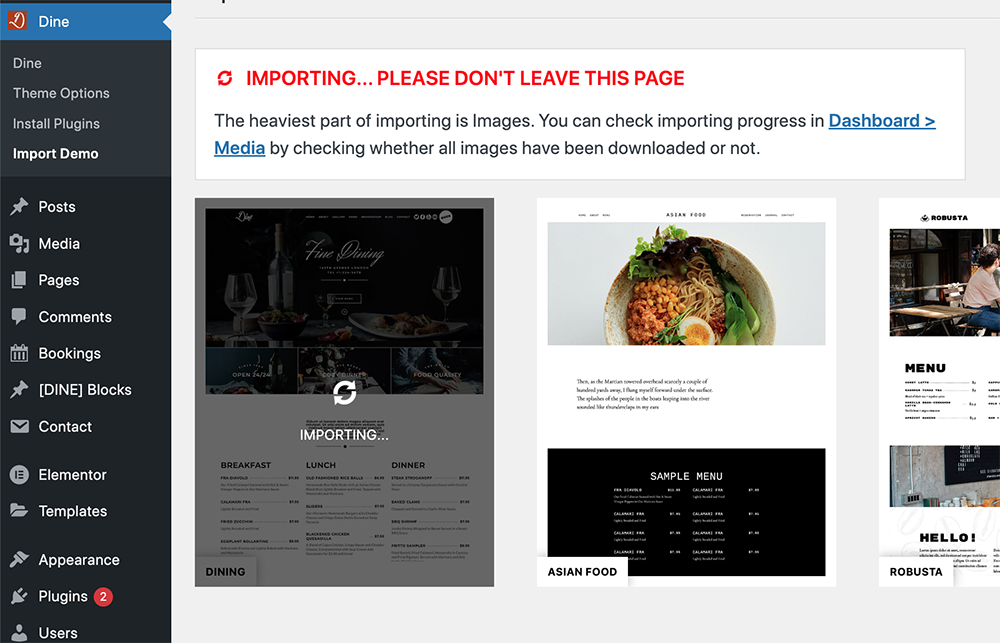
During the importing process, you’ll see this screen. Just wait for few minutes.
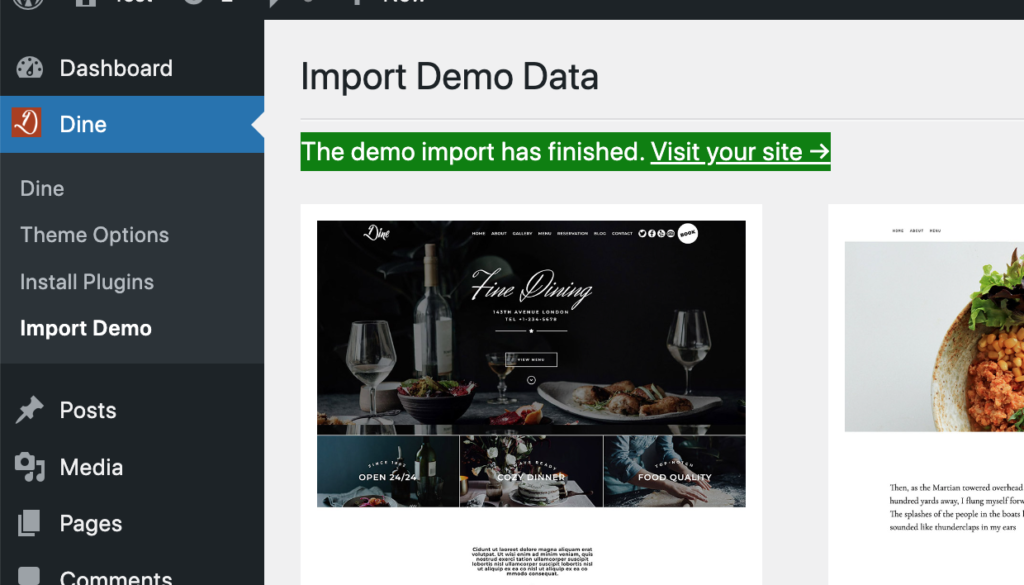
You’ll see a message like this after it finish importing demo content.
Step 3: Import Elementor Style
After importing the content, you’ll see your site looking like this:
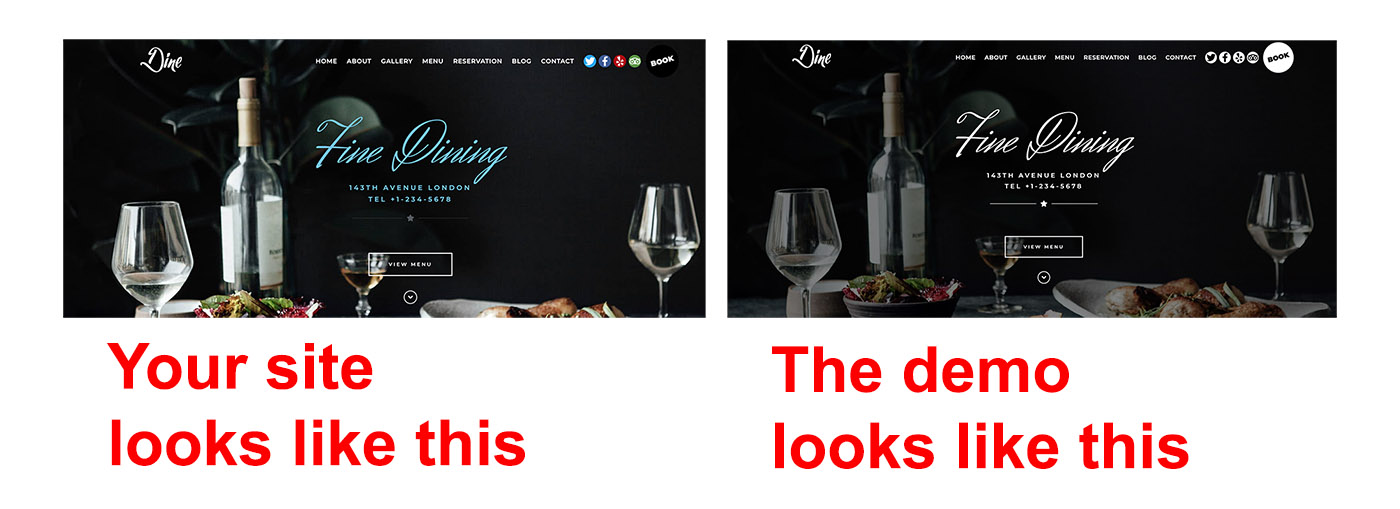
It’s because of the lack of Elementor Style. That’s why we need the last step: import Elementor style.
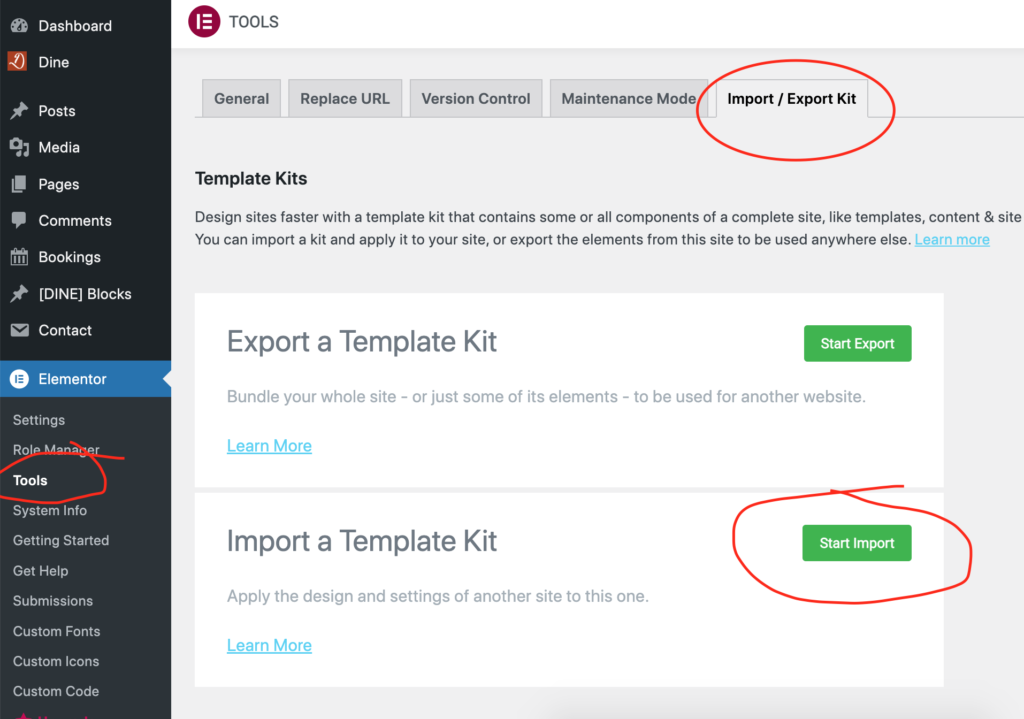
Step 3.1: Go to Dashboard > Elementor > Tools > Import/Export Kit > Start Import.
Step 3.2: Depending on which demo you chose, please download following Elementor style file:
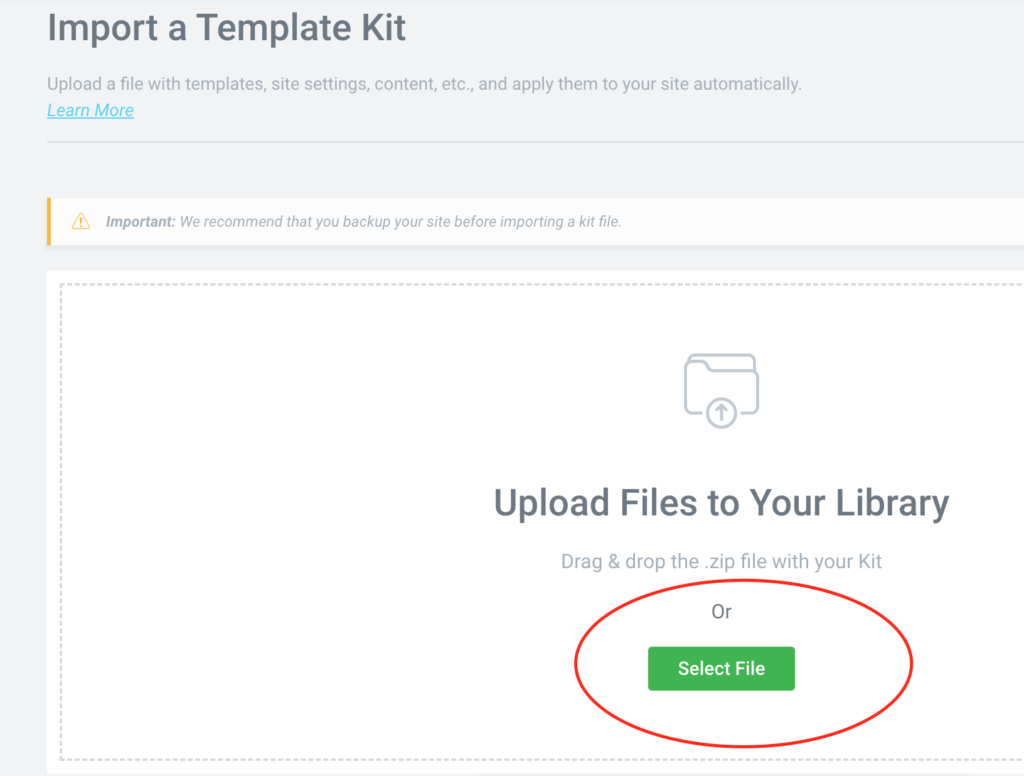
then click Select File and upload it.
Then just continue hitting the green button, don’t do anything else.
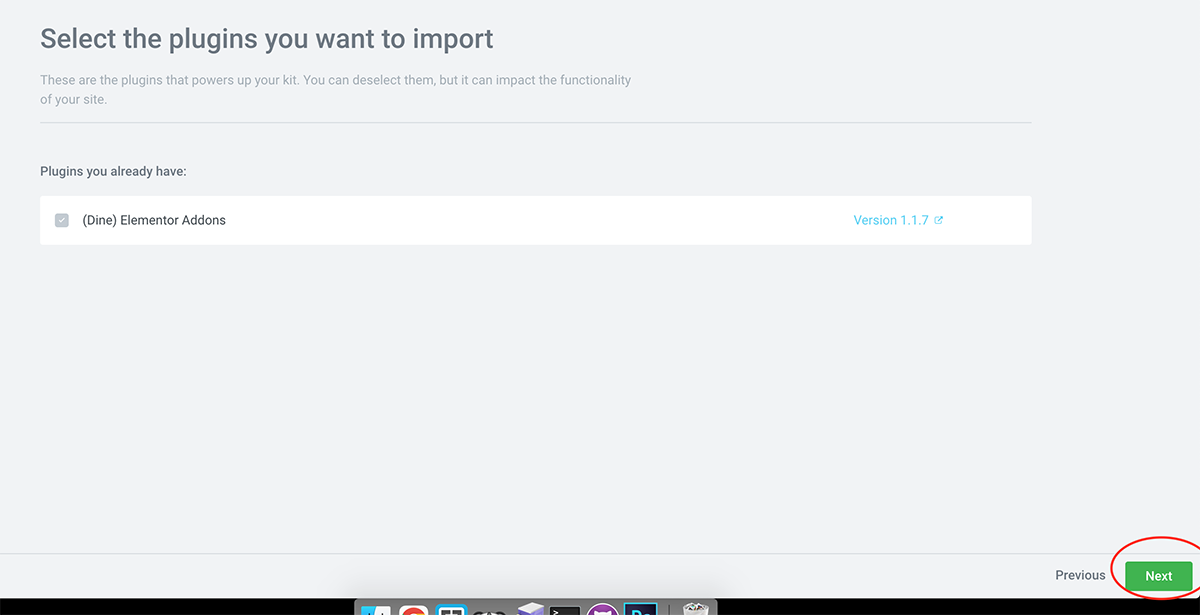
Click Next at the bottom-right corner
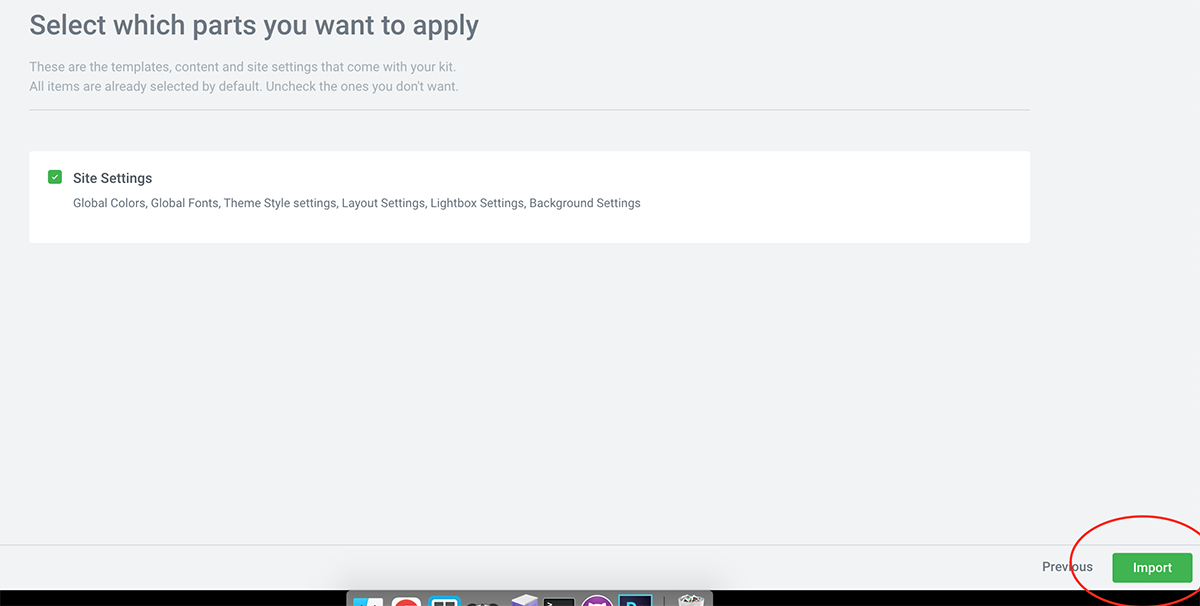
Click Import at the bottom-right corner
Then you’ll see following screen. Now your site is 100% same as demo.
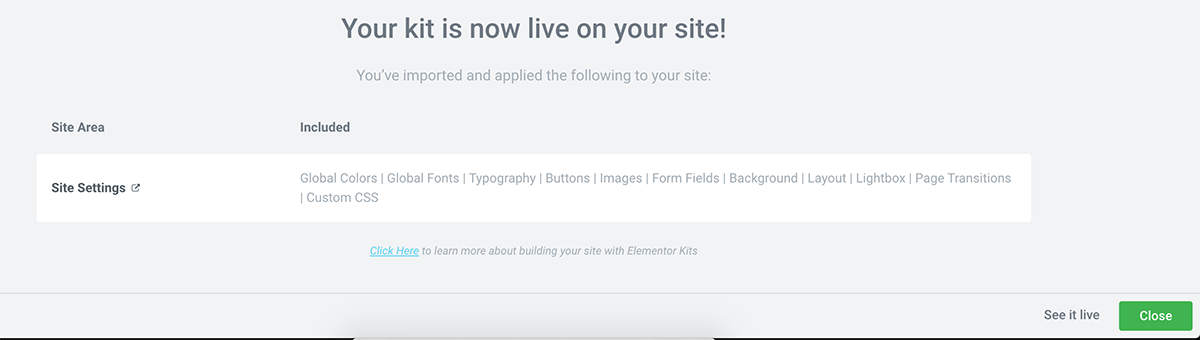
That’s all. Now you can hit the green Close button and start customizing your site.